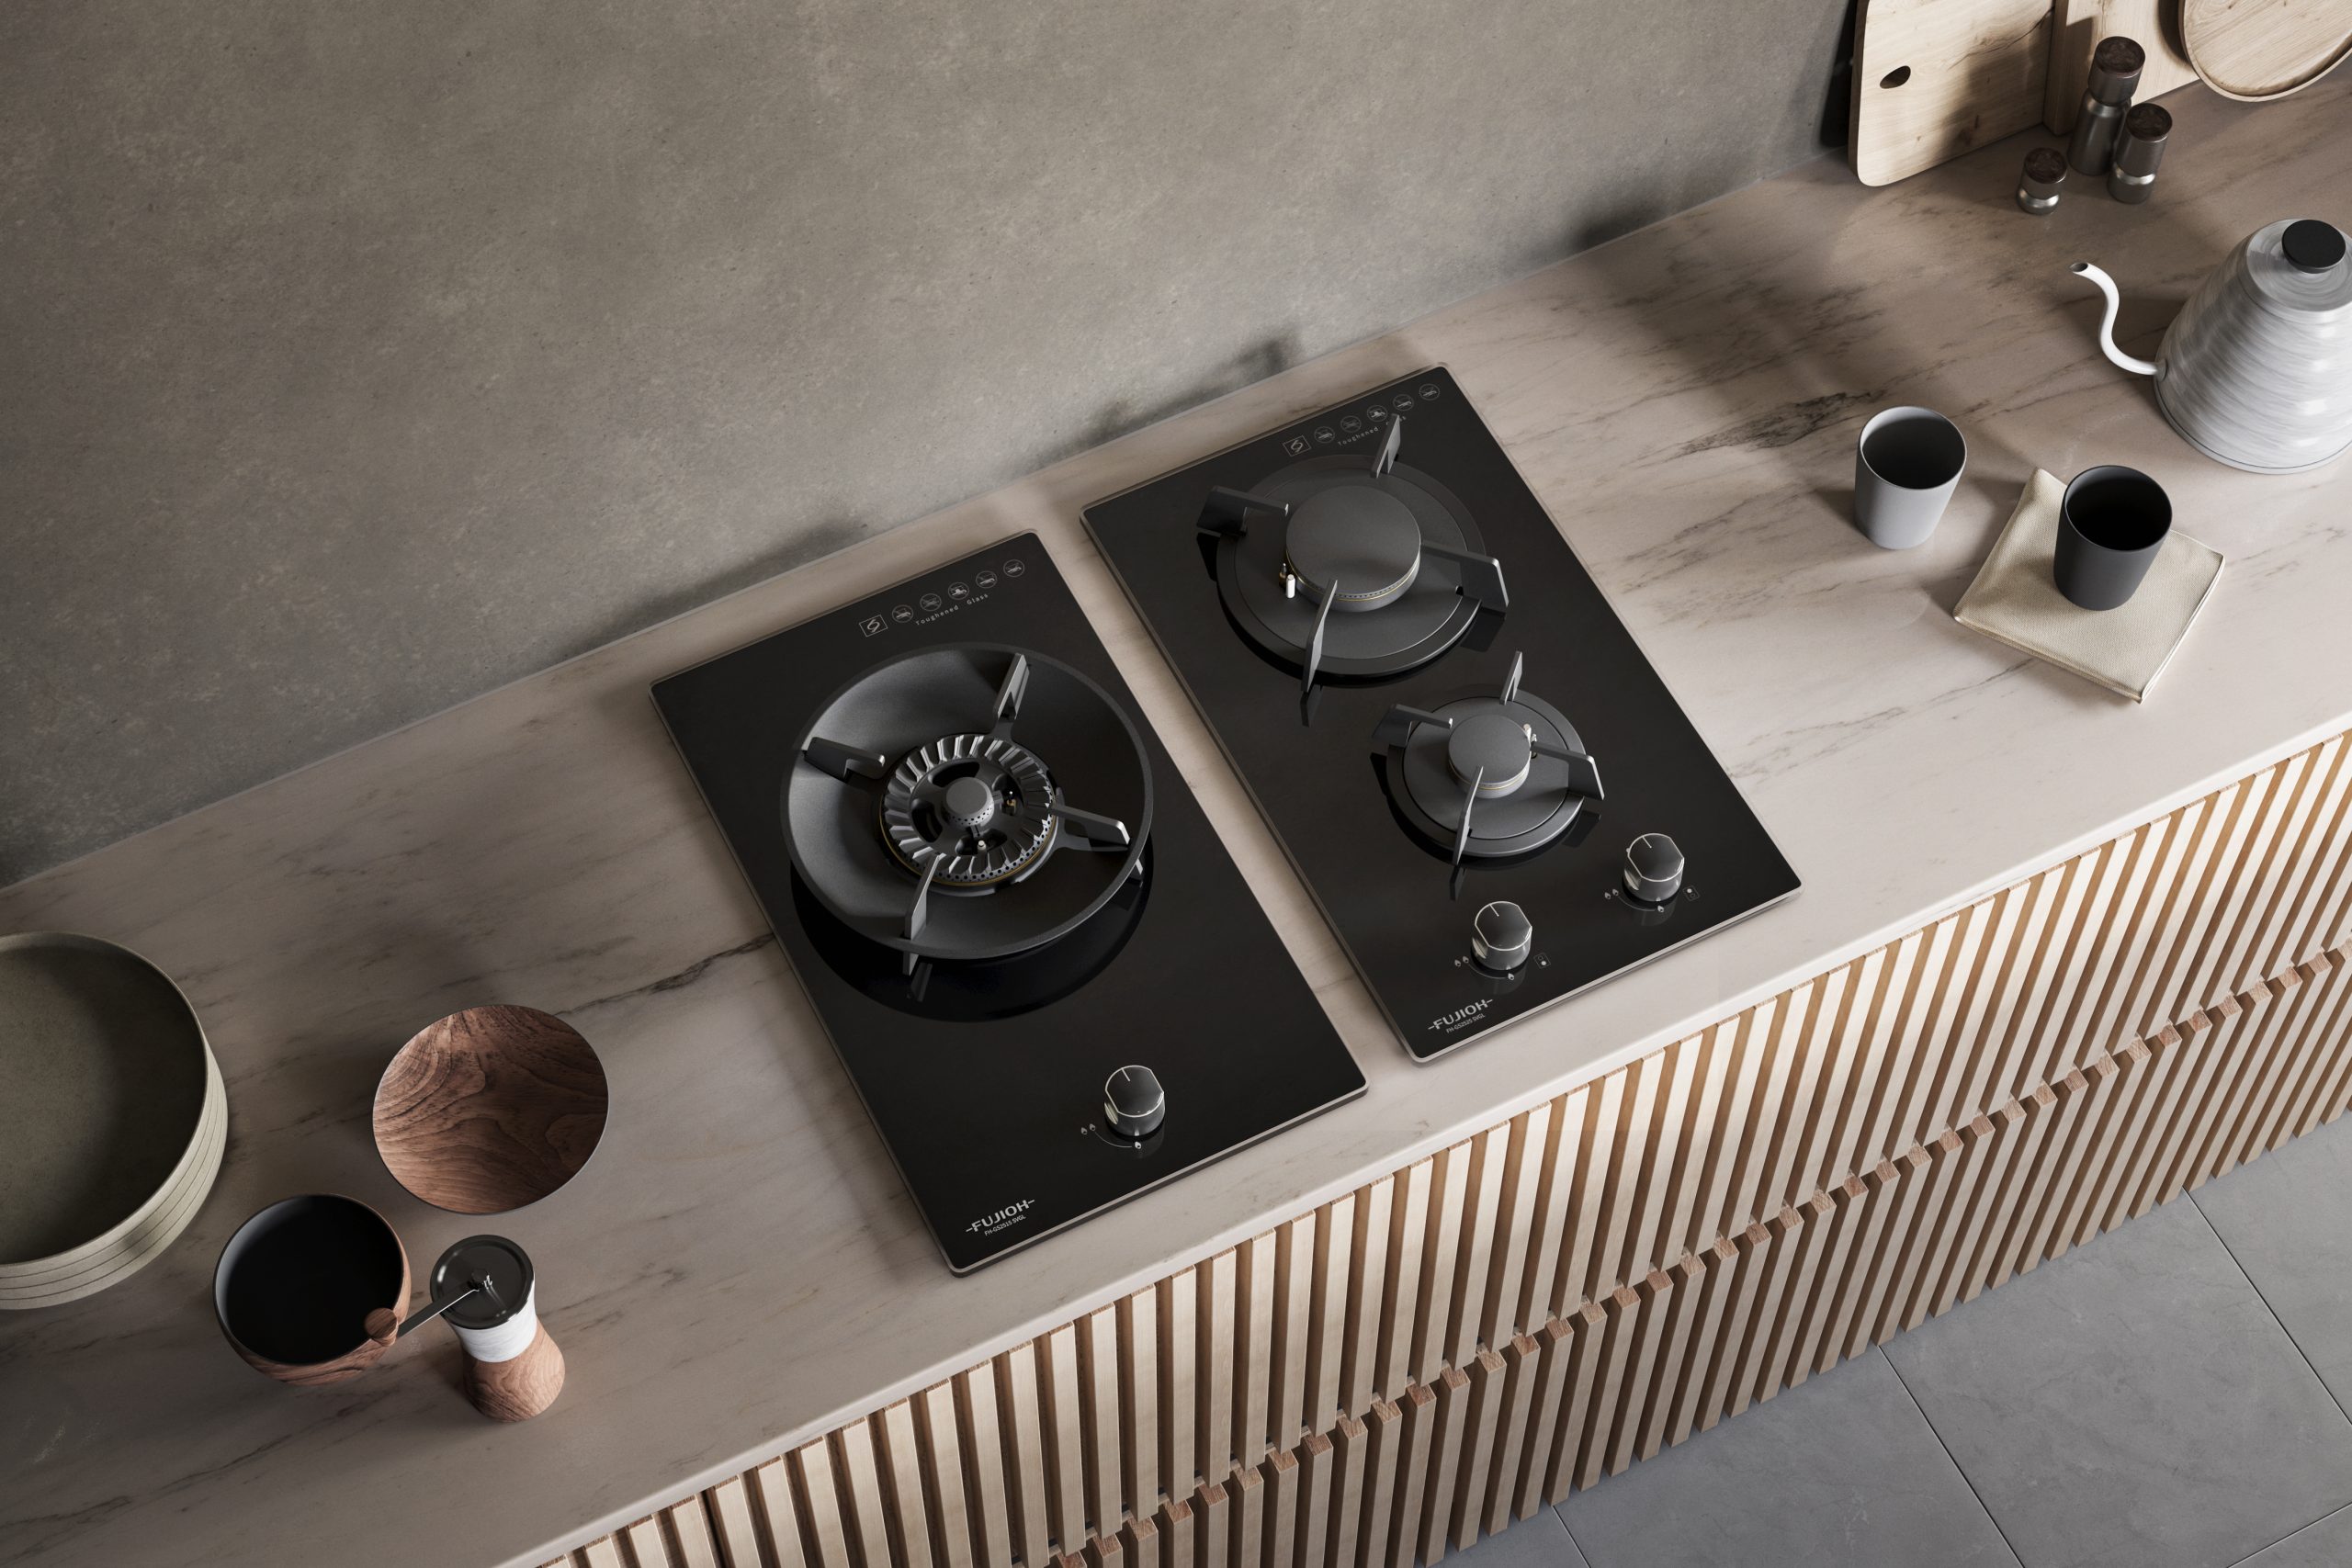
Featured Product: FH-GS2515 SVGL and FH-GS2525 SVGL Domino Gas Hob
Bringing a new gas hob into your kitchen promises exciting culinary adventures. As homeowners embark on renovation journeys, the thought of handling kitchen appliance installations might cross their minds, perhaps wondering if they can tackle it themselves.
While the appeal of DIY is strong, offering perceived cost savings and a sense of accomplishment, gas connections involve specific complexities.
This means that ensuring a safe and proper connection demands expertise that goes beyond basic handyman skills. Relying on anyone other than a qualified installer can lead to serious hazards and may also invalidate your appliance’s guarantee.
Thus comes the question: can you actually install a gas hob yourself?
Firstly, proper preparation of your countertop is essential for a safe and stable gas hob installation.
To ensure the appliance fits securely, the cutout dimensions in your countertop should be slightly smaller than the gas hob itself. But always consult the manufacturer’s installation instructions for precise measurements, as these details are crucial for a perfect fit. And for optimal structural integrity, ensure the cutout area is made cleanly and precisely according to the manufacturer’s guidance for greater stability to the countertop.
Beyond the immediate cutout, consider the surrounding clearances. When embedding the appliance into kitchen fixtures, ensure a minimum clearance of at least 100 to 150mm between the bottom of the cooktop and any underlying appliance or shelf.
It’s also important to maintain specific distances from adjacent walls: the hob should be no less than 200mm from any side wall and at least 70mm from the rear wall. If a cooker hood is positioned directly above, ensuring adequate vertical distance between the hood and the top of the hob’s pan supports is essential for safe and effective ventilation. However, this minimum vertical allowance varies depending on the specific cooker hood model. For instance, the installation distance for the FR-SC2090 typically ranges from 445 to 550mm, while the FR-CL1890 requires a distance of 650 to 850mm.
It is important to note that these measurements serve as general guidelines. Specific clearance requirements can vary significantly depending on the product model, so always consult your hob’s user manual for precise details.
Beyond the general requirements for your gas hob’s cutout and surrounding clearances, the specific setup of the cabinet or appliance directly beneath it dictates further critical installation parameters.
When your gas hob is positioned directly above a drawer unit, to prevent heat buildup from affecting the contents of the drawer and to ensure proper ventilation, maintain a vertical gap of at least 100 to 150mm between the top surface of the countertop and the top of the drawer. Additionally, the drawer unit itself should have a minimum internal running length of 480mm to accommodate safety considerations and air circulation. These are average measurements, but it’s always advisable to have a qualified expert verify the precise measurements for your specific setup.
Installing a gas hob directly above a built-in oven demands particular attention to heat resistance and ventilation as well. For one, a heat-resistant horizontal partition should be installed between the gas hob and the built-in oven, with at least 100 to 150mm of clearance from the hob’s underside to allow air circulation and protect the gas tubing from oven heat.
Understanding how gas connections work is another key part of planning your gas hob installation. There are two primary types of gas supply to consider: Town Gas and Liquefied Petroleum Gas (LPG).
For town gas supply in Singapore, homeowners typically apply through City Energy, the designated Town Gas Retailer. They will facilitate the connection to the main gas network and coordinate with the Transporter to manage the gas admittance process for your property.
LPG, however, is supplied via gas cylinders and is often used by homeowners who prefer an alternative to the government-piped gas. While some customers may install their LPG hob themselves, it is crucial to perform a thorough leak test after installation to ensure all connections are secure and safe.
Professional gas pipe installation services are readily available across Singapore for various premises, including residential homes, commercial businesses, and industrial sites. This process, including the laying of the gas pipe and the installation of flexible tubing to the gas hob, must be handled by a licensed contractor or directly through the gas supplier, such as City Energy. This crucial step ensures that the gas lines are safely and correctly installed according to strict local regulations, providing the necessary infrastructure for your gas hob.
Once the gas pipe installation and any kitchen renovations are complete, a separate appointment is required to activate the gas supply. During this scheduled visit, the gas meter will be installed, and the gas supply will be introduced to your property, and the hob will be tested to ensure proper function and safety before use.
While a license may not be required for LPG installation, adhering to safety standards is essential, and engaging a suitably trained professional is highly recommended.
If you are handling LPG:
Some providers offer comprehensive services extending beyond simple gas delivery. A full-service provider can handle supply, installation, and maintenance, as well as piping installation, licensing, and system repairs. This ensures your entire LPG setup is handled safely and professionally.
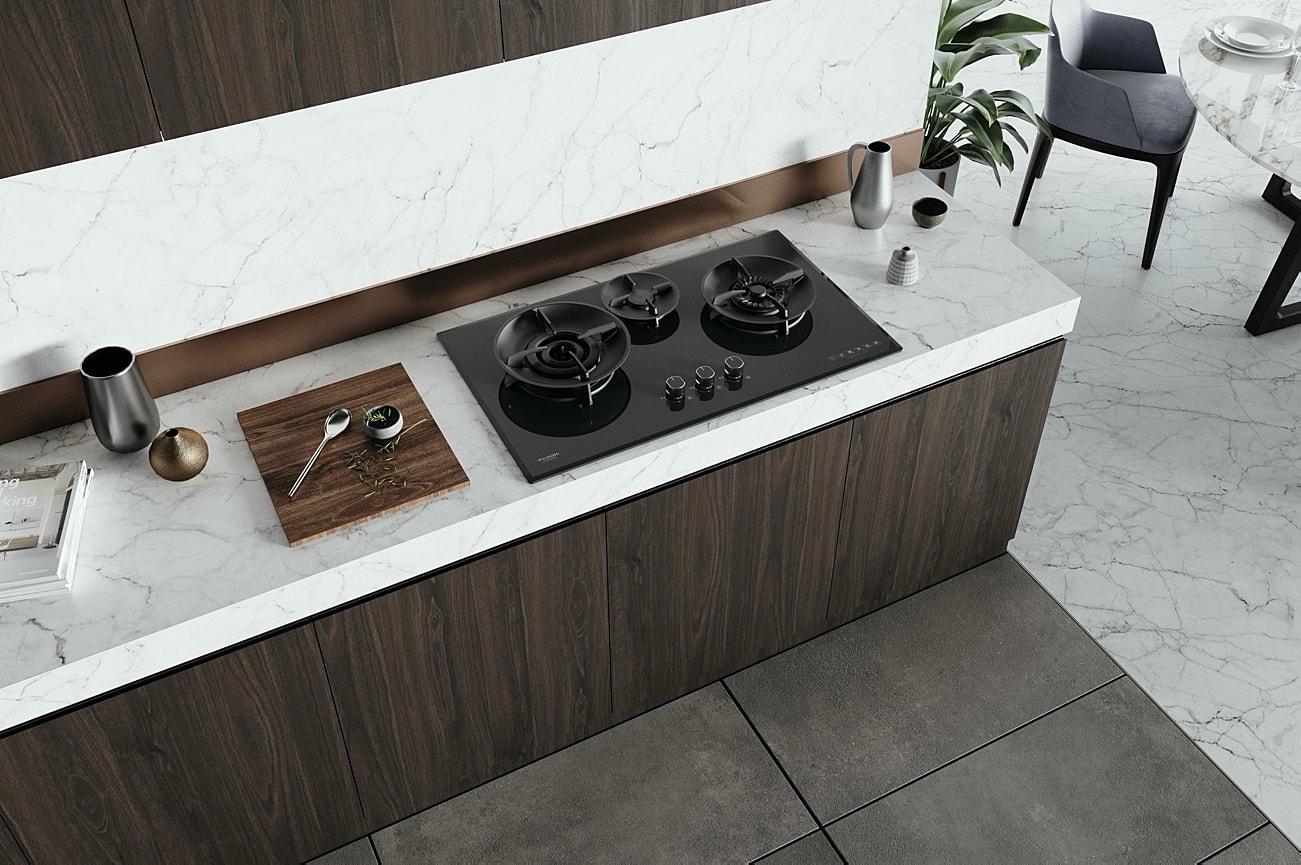
Featured Product: FH-GS7030 SVGL 3 Burners Gas Hob with 1 Double Inner Flame Burner
So, back to the question: Can you install a gas hob yourself?
While certain physical setup steps can be attempted, it’s essential to remember certain steps always require certified professional assistance for safety and warranty validation.
Before beginning the physical installation, gather all necessary tools. This toolkit should include screwdrivers, wrenches, and any other specific items recommended in your gas hob’s manual.
Carefully choose the ideal spot for your new gas hob. Beyond the visual appeal, consider practical aspects like its proximity to the professionally installed gas supply line and the kitchen’s existing ventilation system. Strategic placement at this stage contributes significantly to both functionality and a streamlined cooking experience in your kitchen.
Prepare the countertop surface where your gas hob will sit. This crucial step involves precisely cutting and smoothing the opening to the exact dimensions specified by the manufacturer.
With the countertop prepared, carefully align your gas hob with the opening. Once perfectly positioned, gently lower it into place. Ensure it sits firmly and then secure it using the manufacturer’s clips or brackets.
This critical step must only be performed by a qualified and licensed gas professional. They will handle the connection of your gas hob to the main gas supply line with extreme caution, ensuring all fittings are secure and leak-free.
After the gas connection has been professionally completed and secured, you can proceed with verifying the hob’s functionality. Test each burner to ensure it ignites properly and produces a consistent flame. This confirms that all connections are correct and the hob is ready for operation.
Once your gas hob’s installation is fully complete and all tests are passed, you’re ready to enjoy its performance. Begin using your new appliance for all your cooking needs.
If you require more information on our kitchen appliances and gas hobs, feel free to get in touch with us at FUJIOH Singapore or email us at fit@fujioh.com.sg.
